How To Pierce Your Ears Yourself

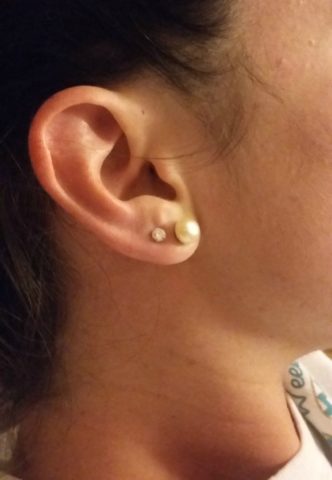
When I was in college (and on a budget), this is how my friends helped me pierce my ears.
I had wanted to get my second holes for awhile. But being a poor college student, I couldn’t justify spending the money.
My best friend (who’s a nurse) had the lovely job of piercing my ears — because I was too cheap to pay for a professional piercing.
We did it in the hotel room during our spring break trip senior year of college.
So now I have a fun story to share and a silly memory to look back on!
If you’ve seen the movie Parent Trap starring Lindsay Lohan, then you remember the ear piercing scene:
Okay, here’s how to pierce your ears yourself at home…
Materials Needed
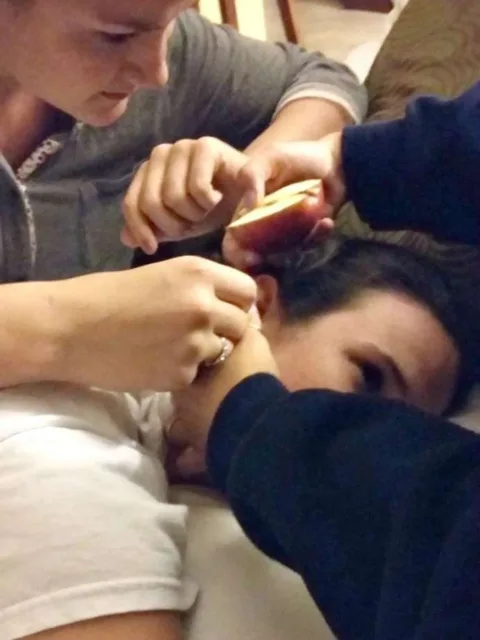
There are ear piercing kits available, but these are the items we used:
- An extra long needle (or a sterilized ear piercing needle)
- Matches (to sterilize the needle)
- A Sharpie marker
- Ice cubes
- An apple
- A pair of earrings
- A nice stiff drink (…for the one receiving the piercing!)
TIP: If you have sensitive skin like I do, make sure to research the metal of the earrings you’ll be using. My ears regularly get infected when I wear fake metal. The earrings we used after my piercing were zinc-based (which is a form of white metal) and they worked great.
How To Pierce Your Ear At Home
#1 – Use the Sharpie to make a reference point on the earlobe.
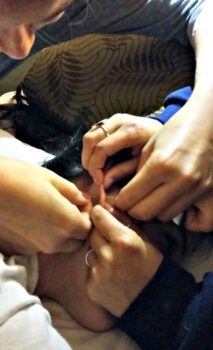
My friend performing the piercing marked both of my earlobes for a reference point at the same time — using a Sharpie marker.
This ensured that the end result would be straight and level as well as equally spaced apart between the ears.
After I looked in the mirror, I confirmed that it was all even and I was ready to get my second holes pierced.
#2 – Sterilize the needle… and bottoms up.
Using the matches, start a flame and warm the sharp end of the needle you will be using.
The heat of the fire will help to rid the needle from any germs or bacteria.
While my nursing friend sterilized the needle, my other friend made a very stiff drink for me to down before we began. (It definitely wasn’t necessary — but we made it part of the experience anyway.)
#3 – Slice the apple while you ice your ear.
Cut the apple in half (or even fourths, if it’s a very big apple). The apple will be placed behind the ear, flush against the back of the earlobe.
While the apple is being cut, have the person receiving the piercing numb the area with ice cubes.
We used 1 ice cube and held it on the front part of my earlobe for 30 seconds. We repeated this 2 to 3 times until I couldn’t feel anything.
When the piercer is inserting the needle, it will be hard to see if the needle went through the lobe entirely. By having the apple behind the ear, you’ll be able to hear the needle make contact with the flesh of the apple.
This will ensure that you’ve indeed gone through the skin of the lobe and have made a successful hole.
NOTE: This is where an “extra long” sewing needle comes in handy! When my friend performed the piercing on my first ear, the needle actually got stuck in the apple because there wasn’t enough leverage to pull it out. I couldn’t see anything because I was lying on the couch with my head turned while my friends kept my head still. I could hear my friends — and it felt like they were talking through their eyes. My friend who was not performing the piercing began squeezing my hand. I couldn’t feel much — because my ear lobe was good and numb from the ice cube. But I could feel them pushing on my head. Finally, I heard my friend who was doing the piercing whisper “I’m trying, but it’s stuck.” I immediately realized what was going on! I heard the needle meet the apple so I knew a hole had been successfully made, but the needle was still through my ear and so now it was stuck in the apple. I almost panicked — as I had visions of us having to go the emergency room for “ear piercing gone wrong.” But after a few more attempts, she was able to pull the needle out and it was fine!
#4 – Place the earring.
As soon as you remove the needle from the freshly pierced hole, immediately insert your earring.
And there you have it… that’s how to pierce your ears at home!
TIP: I cleaned my newly pierced ears twice a day with an antibacterial soap or spray. I also rotated the earrings by turning them while they were in my ears. (This just helps with the piercing as it heals.) I left my earrings in for about 6 weeks after we pierced them before I began changing out my earrings.
This video shows how to safely pierce your ears yourself:
More Tips To Safely Do Ear Piercings At Home
In addition to the links and tips I’ve included above, here are some other resources to help you learn how to pierce your ear yourself:
- How to safely pierce your own ear, according to a professional body piercer
- Here’s how to speed up the healing of newly pierced ears from Studs Ear Piercing Studio
- This video shows how to pierce your ears safely at home
- WebMD gives us all the safety precautions and tips for piercing your ears

